If you’re not offering printed photos to your clients, you’re leaving money on the table. It’s a fact proven time and time again by professional photographers who have been doing this shit for years. I know firsthand how hard and intimidating it can be moving from a “digital-only”photographer to a “full-service” or “in-person sales” photographer. Luckily, we get by with some tools from our friends.
There’s a reason why Fundy Albums is on my tech stack build list. You can also pair it with any of my other favorite low-cost software in order to build the business of your dreams affordably.
Here’s how to build wedding photography albums with Fundy Software.
What you need to get started:
- Images, duh. These should be:
- An entire client gallery
- A list of your client’s favorites or
- A list of your favorites or
- A list of your client’s favorites mixed with a list of your favorites
- A Fundy Subscription or One-Time Fee download
- Use code ‘4cvb2w’ to get 20% off your first year
- You can also purchase Fundy for a one-time fee of $549 (or $449)
- The name of your album company
- (for example: The Boudoir Album, Millers, WHCC, Red Tree, Dreambooks Pro, etc.)
- The size of the album you’ll be mocking up
- Pro Tip: Show what you want to sell. If you want to sell 40-spread albums that are 8×12” don’t show 20-spread albums that are 6’8”. You’re the expert. Guide the clients to what gets them and you the best bang for your buck.
Designing your Wedding Photography Album with Fundy software
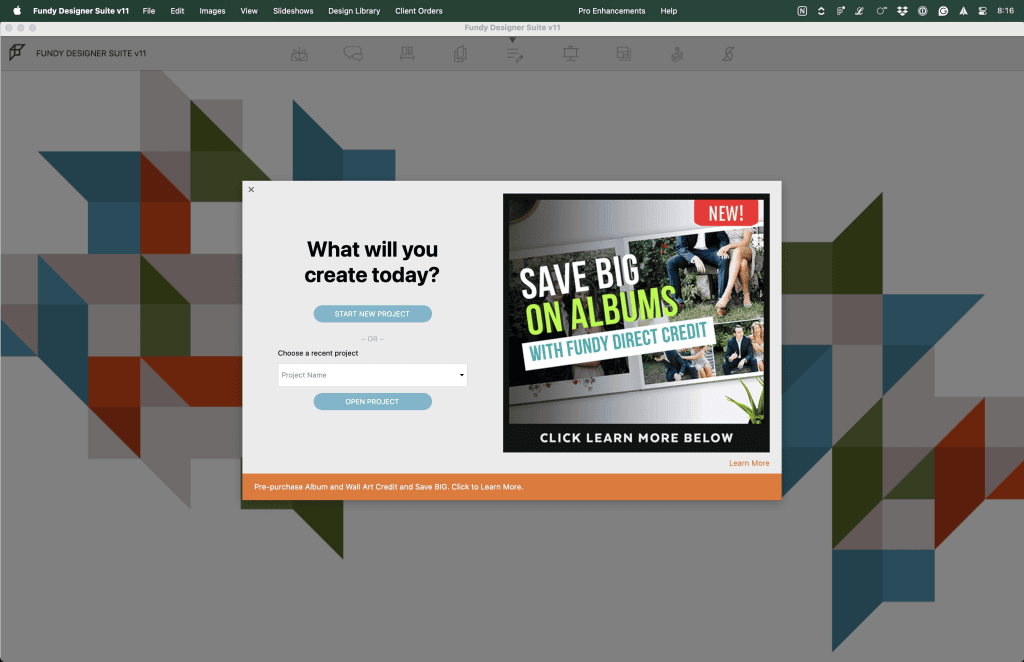
When you load Fundy, you’ll be greeted by this screen. If this is your first time making a Fundy album, click “start new project” and pick where on your computer you want your files to live. I have a file called “Fundy” in my documents folder to keep things simple.
First, import those photos I had you get ready


You’ll be asked a couple of questions involving retouching or having Fundy design everything for you. For this tutorial, and because I don’t use these options for my business, you’ll want to skip the additional retouching and click “Customize” on the design for me page.
Can you let Fundy do all the hard work?
Absolutely. I will do nothing to stop you. If you’re wondering why I do these things on my own, here’s a quick rundown:
- I’m type A- which I use to describe the fact that I can be a control freak but only about very specific things.
- Just like day-to-day operations, AI or any type of auto program can only do so much. One big thing they can’t do? The type of meaningful storytelling or attention to detail that I can do.
Let’s move on.
Next, Input those album details I mentioned earlier. Namely, your album size and and album company.

I’ve highlighted the most important bits. For this tutorial, I’ve turned off Wall Art, Cards, & Slideshows but these are all also very good tools to use to help you upsell so if you’re interested – check those out as well!
Here, I’ve used The Boudoir Album , or TBA, (they print everything, not just boudoir, super fast and super beautifully) with no cover, and 9×12”. My goal is for every client to walk away with a maximum of 40 spreads (80 pages). (For my boudoir albums I sell by image instead of spread since the way I design is a little bit different.) For wedding images I want the client to fall in love with the way I’ve told their story instead of a focus on individual outfits or images.
I also put ‘0’ in the pages to design and total images so that I can have total control.
Play with the settings til they make sense to you and if you want it to load the same every time click on the bottom to name your preset and save it under whatever name you’d like.
When you’re ready, hit design project.
Start designing
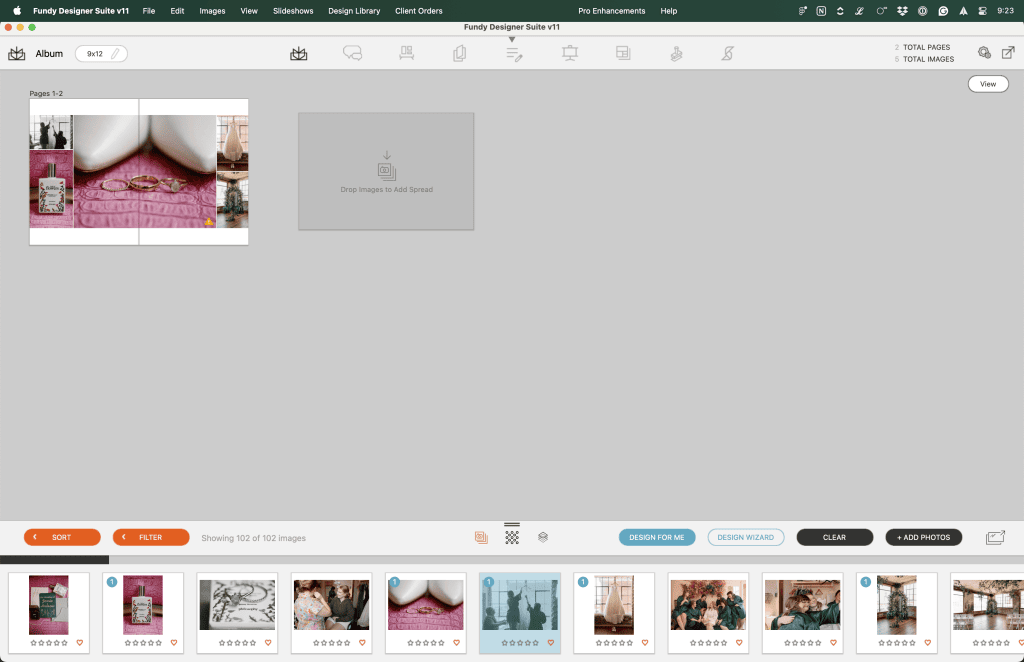
Adjust your design

Section One (L → R)
- Magnify/Loupe – creates a box you can grab to view parts of your design much bigger
- Flip Design – Swap what’s on the left page to the right and vice versa
- Add Text – Add text to your design
- Add Color Box – Add a rectangular shape with any specified color
- Background Color – Change the color behind your images to whatever you’d like (white is the default)
- Save Design – If you create a design off the beaten path that you’re in love with, save it here to replicate it throughout your design
- Toggle Guides – Perfect if you’re pixel obsessed (like me) and want to view guides to place images and boxes in specific places
- Layouts – Want to switch around the images or create a starting point without having to figure out aesthetics from scratch? Click this and get a whole slew of options. This is usually where I start and then in Section Three I fine tune everything.
Section Two (L → R)
- Arrows – Click through the different pages in your design, in order
- Show Comments – If you opt into Fundy’s Pro Enhancements you can add proofing where your clients can leave specific comments about what they’d like changed. (Already have Pic-Time and don’t want to pay for another tool? They have built in proofing!)
- Add Spread – Adds an additional spread (two pages) after the one you’re currently on
- View – Go back to the pulled out view of your album with all your spreads/pages visible
Section Three
This is your design section. Any boxes or text you may add will appear here. You can also Drag and drop your images however you’d like and depending on the aspect ratio of your images, the layout with change. You can also grab the red borders that appear and adjust the boxes even more to show more or less of images you add.
Section Four (L → R & T→B)
- Sort by different things like capture time, rating, name
- Filter by different things like unused images, star rating, images used in this project, etc.
- Showing how many images out of how many to let you know if you’re in a filtered view
- Photos shows all of the photos in your particular filter/view that you put into your project
- Patterns gives you a good number of patterns to add to your design as backgrounds, accents, etc.
- Graphics gives you pre-loaded sayings and different artistic images to add to your designs
- Design for me brings back that first window we looked at where you can either decide to do things manually or choose to let Fundy auto design if you’d like
- Design wizard brings back the next page where you can pick your album company and all the specifics that go with it
- Clear will set your album back to a blank slate. You will get a warning beforehand but CLICK WITH CAUTION
- Add photos opens your file finder to add more phtoos from whatever you choose
- Open image browser window brings up the internal file browser so you can see all the images you have loaded so far
Tips & Tricks for creating your album!
After using Fundy for 5+ years, here’s my favorite little tricks for album creation that make my life a little easier.
- To save money – I create my albums in Fundy and then upload them to Pic-Time in their Album Proofing section. (Client Gallery → Workflow → Album proofing) Here’s a help article about it ‘til I write my own!
- Use View > Toggle File Names to make easy edits. It shows photo names which pairs great with Pic-Time’s album proofing. You can swap images as your client desires. I just let them know to comment using the image names as a guide.
- When exporting your images for proofing there’s a section to export with file names to go into your album proofing for reference. Just make sure you do not toggle this when you’re uploading to your album company.
- Go to Edit > Choose External Editor in case you want to use a specific tool to edit your images. Your images will open in said program if you right click + edit image and when you save it it’ll auto update right in Fundy
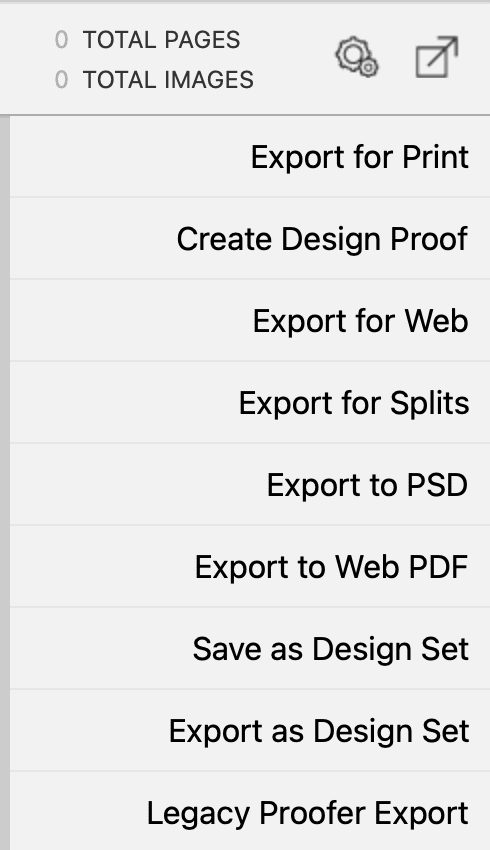
Export your design
Since we’ve already picked your correct settings, you’ll want to just export your pages to send them to your lab. They all do something a little bit different but the main concept is the same. It’ll export the spreads in number order and then voila. You’ve ordered.